How to Install Lightning Arrester for Home
Even if you feel completely safe indoors when lightning is crashing overhead, a direct strike—or even one nearby—can send hundreds of thousands of volts of current surging through your home’s electrical wiring. This massive electrical surge can instantly destroy expensive household appliances, cause irreparable damage to smart home systems, and even ignite devastating electrical fires right within your walls.
Protecting your property requires more than just unplugging your television when it rains. You need a dedicated, proactive defence system designed to safely handle extreme electrical surges. That is exactly what a lightning arrester provides.
This is precisely what a ‘lightning arrester’ does. By intercepting dangerous voltage spikes before they can damage your home’s internal circuitry, this arrester serves as an essential shield for your property and your family.
If you wish to protect your home from severe weather, it is essential to understand how to install a lightning arrester. Read on to learn about the basic methods for electrical safety in homes.
Understanding Home Lightning Arresters
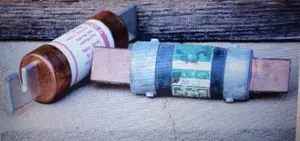
Essentially, a lightning arrester is a modern electrical device designed to protect your home’s power infrastructure from sudden, excessive voltage surges. When a lightning strike hits your property or nearby utility lines, it creates an enormous surge of electricity that races toward your house. If you want to learn more about lightning arresters, you can read our article page titled “Understand Lightning Arrester Importance.”
The arrester typically sits near your main electrical panel or service entrance. When it detects a dangerously high voltage spike, it acts like a high-pressure bypass valve, instantly opening. It intercepts that massive surge of excess energy and safely diverts it directly into the ground via a grounding wire, thereby keeping the delicate electronic devices inside your home safe.
While massive commercial buildings require complex industrial arrays, residential lightning arresters are much more straightforward. For a standard home setup, you generally have two main models to use:
- Meter-based arresters: Your local utility company usually installs these directly behind the electric meter. They provide an excellent first line of defence against surges travelling straight from the power grid.
- Panel-mounted arresters: An electrician installs these directly into your home’s main circuit breaker box. These compact, whole-house residential models are highly effective at neutralising any residual surges that slip past the meter, ensuring comprehensive protection for your home.
Pre-Installation Checklist
Before you begin the installation process, you need to prepare properly. A successful installation requires careful planning, the right equipment, and a clear understanding of local regulations.
Assess Your Area Risk
First, determine your home’s actual risk level. Do you live in an area that experiences frequent thunderstorms? Homes located at higher elevations, surrounded by tall trees, or situated in regions with high thunderstorm activity face a greater risk of direct strikes. Even if you do not live in a high-risk zone, investing in proper surge protection is a smart way to safeguard your expensive electronics and appliances from unpredictable weather.
Gather Required Tools and Materials
The job becomes much easier when you use the appropriate tools. For a standard lightning rod installation, you will typically need the following items:
- The lightning arrester unit
- A heavy-duty copper grounding rod
- Thick, bare copper grounding wire (usually 4 AWG or 6 AWG)
- Grounding clamps
- A heavy mallet or sledgehammer
- Wire strippers and a screwdriver set
- Personal protective equipment (safety glasses and insulated gloves)
Consult Local Building Codes
Never skip checking your local building codes. Electrical safety regulations vary widely by city or county. Many municipalities require a permit to install an arrester or mandate that a licensed electrician handle any modifications to your main electrical panel. Always verify these rules to ensure your installation is fully legal, safe, and up to code.
Step-by-Step Guide to Installing a Home Lightning Arrester
Installing an arrester involves dealing with high voltage and critical structural components. If you feel unsure about any of these steps, please hire a qualified electrician.
Step 1: Choose the Right Lightning Arrester
Lightning arresters vary in design and functionality. You need to select a model that matches your home’s electrical capacity. Check your main breaker panel to determine if you have a 100-amp or 200-amp service, and buy an arrester rated for that specific amperage. Additionally, review the surge capacity rating, typically measured in kiloamps (kA). A higher kA rating means the device can handle larger electrical spikes.
Step 2: Identify the Installation Location
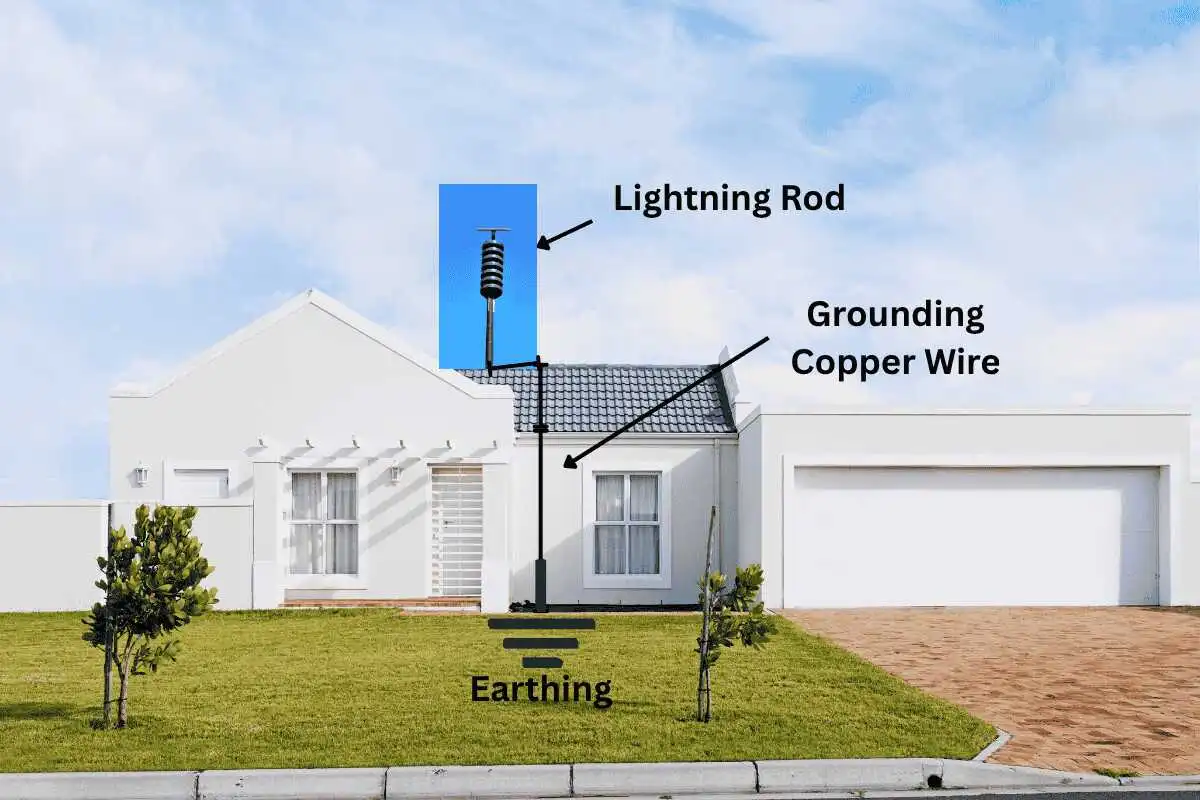
Where you place the arrester depends on the type of system you bought. If you are installing a traditional lightning rod (air terminal) system, you must mount the rods at the highest points of your rooftop. However, if you are installing a whole-house surge arrester, the ideal placement is directly at or adjacent to your main electrical panel.
Step 3: Install the Grounding System
An arrester is useless without a path to direct the electricity safely into the earth. Find a spot outside your home, close to the electrical panel, to install your grounding rod. Use a sledgehammer to drive the heavy copper rod deep into the soil. You generally need to drive it at least 8 feet into the ground to ensure a stable, secure earth connection. Once the rod is firmly in the ground, attach your thick copper grounding wire to it using a heavy-duty grounding clamp.
Step 4: Connect the Lightning Arrester
Before you touch any wires, turn off the main power supply to your home at the breaker box. This is non-negotiable for your safety. Mount the arrester near the panel according to the manufacturer’s instructions. Route the wires from the arrester into the panel. Connect the designated ground wire from the arrester directly to the grounding bus bar inside your panel, which should then link to your newly installed outdoor grounding rod. Connect the remaining phase wires to the appropriate breakers as specified by the product manual.
Step 5: Test the System
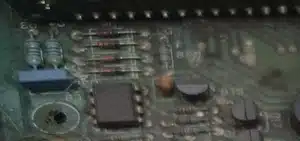
After firmly securing all connections, you can turn the main power supply back on. Most modern thunder arresters feature LED indicator lights on the front panel. Check these lights immediately; a green light typically means the system is active and functioning correctly. If the device lacks indicator lights, you can use a digital multimeter to verify that the voltage is flowing correctly and the ground connection is secure. Regularly monitor these indicators after large storms to ensure your home remains protected.
Safety Tips During Installation
Installing a lightning arrester is a fantastic step toward securing your property from severe weather. However, home electrical safety must always remain your top priority. You are working with the central nervous system of your house. A single mistake near high-voltage wiring can result in a severe electric shock or a short circuit.
Before you touch any wires or open your electrical panel, you need to understand the hazards involved. Proper preparation and a safety-first mindset will ensure your lightning protection project goes smoothly and securely.
The Critical Importance of Shutting Off the Power
The very first rule of any electrical project is to kill the power. You must turn off the main power supply before beginning any work on your lightning arrester. Proper preparation and a ‘safety first’ approach will ensure your home lightning protection system is completed safely and without interruption.
Do not just trust the switch, though. Always use a non-contact voltage tester or a digital multimeter to confirm the power is actually off. Check the specific wires and bus bars you plan to work near. If the tester beeps or lights up, the circuit is still live. Never proceed until you are certain the box is completely dead.
Requirement for Essential Safety Equipment
Even when the power is off, you require a physical safety inspection. Wearing appropriate protective gear is non-negotiable when dealing with home electrical systems. The right equipment protects you from accidental static discharges, unexpected live wires, and flying debris.
- Insulated gloves: Standard gardening or leather work gloves will not cut it. You need heavy-duty, rubber-insulated gloves specifically rated for electrical work. These prevent electrical currents from travelling through your hands.
- Safety goggles: Working with thick copper wires and panel screws often creates small metal shards or sparks. High-quality safety goggles protect your eyes from these unpredictable hazards.
- Rubber-soled shoes: Electricity always looks for the fastest path to the ground. Wearing thick, rubber-soled work boots creates an insulating barrier between your feet and the floor. This prevents you from becoming a human grounding rod in the event of an accident.
When to Hire a Professional Licensed Electrician
While a “do-it-yourself” approach works well for many household chores, handling high-voltage electrical work is not something everyone can do. You must recognise your limitations. Knowing when to stop and when to seek assistance is, from a safety perspective, the wisest decision you can make.
You should immediately hire a professional licensed electrician if you encounter any of the following situations:
- You have an outdated panel: If you open your breaker box and see rust, melted wires, scorch marks, or an old fuse-based system, stop immediately. Outdated panels are highly volatile and require an expert to navigate safely.
- You feel uncomfortable: If reading the wiring diagram leaves you confused, or if the thought of handling high-voltage wiring makes you nervous, trust your gut. A licensed electrician installs lightning protection systems every day and can finish the job safely.
- Local laws demand it: Many cities and counties have strict building codes regarding electrical panel modifications. In many areas, the law legally requires a certified professional to handle any wiring that connects directly to the main service line. Always check your local regulations before starting.
Taking charge of your home’s lightning protection is a great initiative. By respecting the power of electricity, wearing the right gear, and knowing when to call an expert, you guarantee a safe and successful installation.
Cost of Installing a Lightning Arrester
Protecting your home from severe weather should never feel like a financial burden. When thunder rumbles and storm clouds gather, you want the peace of mind that comes with knowing your property is safe. If you are considering residential lightning protection, you likely have one big question on your mind: how much will this actually cost?
Breaking Down the Material Costs
When budgeting for your new electrical safety system, the cost of its physical components accounts for a significant portion of the final cost. The good news is that the materials required for a standard residential setup are readily available and reasonably priced.
The Arrester Unit
The core of your protection system is the lightning arrester itself. For a typical residential whole-house surge protector or panel-mounted arrester, you can expect to spend between ₹4,000 and ₹16,000 (approximately $50 to $200). The exact price depends on the surge capacity rating, measured in kiloamps (kA). Higher capacity units cost slightly more but offer superior defence against massive voltage spikes.
Copper Grounding Rods
A thunder arrester requires a safe path to ground to channel excess electricity. To achieve this, you need a sturdy grounding rod made of copper or copper-bonded steel. At your local hardware store, a standard eight-foot grounding rod typically costs between ₹1,200 and ₹2,400.
Grounding Wire and Clamps
To connect the arrester to the grounding rod, you need thick, bare copper grounding wire and heavy-duty clamps. Depending on the distance from your electrical panel to the outdoor grounding rod, expect to spend an additional ₹2,500-₹5,000 on these essential wiring supplies. Altogether, the total material costs for a standard home installation typically range from $95 to $290.
Professional Installation Labor Fees
While some experienced homeowners might feel comfortable tackling electrical projects, hiring a licensed electrician is always the safest route. Electricians generally charge an hourly rate for their services. Across the country, you can expect labour fees to range from 6750 Rs. to 13500 Rs. ($75 to $150) per hour.
Factoring in the hourly rates, professional labour will likely add ₹12,000 to ₹36,000 to your total project cost. When you combine the materials and labour, a complete, professionally installed residential lightning protection system usually costs between ₹20,000 and ₹60,000. This is a remarkably small price tag for complete home security.
Common Mistakes to Avoid During Installation
Even well-intentioned homeowners can make critical errors when installing electrical safety equipment. Avoiding these common pitfalls ensures your system functions exactly as designed.
Incorrect Placement of the Arrester
Placement dictates performance. One of the most frequent mistakes people make is installing the surge arrester too far from the main electrical panel. The longer the connecting wires, the higher the resistance. High resistance slows down the arrester’s response time during a sudden voltage spike.
To maximise protection, you must mount the arrester as close to the main breaker box as physically possible. Keep the connecting wires short, straight, and free of sharp bends. Sharp angles in the wiring can actually impede the flow of high-voltage electricity, forcing a surge to jump to nearby sensitive circuits rather than flow to the arrester.
Skipping the Grounding System
A lightning arresters without a proper grounding system is entirely useless. The arrester does not magically make electrical surges disappear. Instead, it acts as a detour sign, diverting the high voltage away from your home’s wiring and straight into the ground.
Skipping the grounding rod or using an inadequate ground wire traps that explosive energy inside your electrical panel. This trapped energy will instantly seek the path of least resistance, which is usually right through your expensive household appliances and internal wiring. Always drive a heavy-duty copper grounding rod deep into the soil and connect it securely to your panel’s ground bus bar.
Ignoring Local Building Codes and Regulations
Electrical codes exist for a reason: they keep houses from burning down. Many homeowners attempt to bypass local building codes or skip pulling the necessary permits to save time and money. This is a massive legal and financial risk.
Installation Lightning Arrester Maintenance and Inspection Tips
A lightning arrester is not a “set it and forget it” device. Over time, electrical surges degrade the internal components of the unit. Regular maintenance ensures your home remains thoroughly protected year after year.
Performing Regular System Checks
Make it a habit to inspect your lightning arrester at least twice a year, ideally right before the spring and summer storm seasons. You should also perform a quick visual check immediately following any severe thunderstorm or known nearby lightning strike.
Most modern residential surge arresters feature a small LED indicator light on the front casing. A glowing green light typically means the system is fully operational and actively protecting your home. If you notice the light is red, flickering, or completely dark, your system requires immediate attention.
Spotting Signs of Wear and Tear
Physical wear and tear can compromise your system’s ability to ground a massive electrical surge. During your bi-annual inspection, carefully examine the exterior of the arrester unit and the outdoor grounding rod.
Look for these specific warning signs:
- Corrosion: Check the copper grounding rod and the heavy-duty clamps outside. While copper naturally develops a green patina over time, heavy, flaky corrosion can degrade electrical connections. Clean the clamps with a wire brush if you spot significant rust or buildup.
- Loose Connections: High winds, heavy rain, and natural soil shifting can loosen the grounding wire clamps. Give the wire a gentle tug to ensure it remains tightly secured to the rod. A loose connection completely interrupts the arrester’s path to ground.
- Scorch Marks: Inspect the area immediately surrounding your electrical panel. If you see black scorch marks or melted plastic, or smell a faint burning odour, turn off your main power immediately and call an electrician.
Benefits of Installing a Home Lightning Arrester
Before you gather your tools and begin the installation process, you need to understand exactly why this project matters. Severe weather brings unpredictable hazards, and a direct lightning strike carries enough energy to cause catastrophic damage in a fraction of a second.
Learn about the key benefits of using a lightning arrester for home electrical safety, and understand how this device enhances your overall electrical protection.
Protection From Electrical Surges and Fires
A typical lightning strike can involve hundreds of thousands or even millions of volts of electricity. This extreme surge generates intense, immediate heat. As the electricity pushes through wires that are entirely too small to carry it, the plastic insulation surrounding those wires can quickly melt away. Once the bare wires are exposed, they can easily ignite the wooden framing and drywall inside your walls.
A lightning arrester eliminates this massive risk. Instead of allowing that extreme voltage to enter your internal wiring, the arrester intercepts the surge at the electrical panel.
Safety for Electronic Appliances and Devices
Everything from your flat-screen television to your refrigerator now relies on complex microprocessors to function. Even a minor, secondary surge from a nearby lightning strike can instantly fry the delicate circuit boards inside your electronics.
By neutralising the spike before it ever reaches your wall outlets, a lightning rod arrester ensures your expensive devices survive the storm. You extend the lifespan of your essential appliances and avoid the massive financial burden of replacing your entire smart home ecosystem after a single bad storm.
Conclusion
A lightning arrester is a powerful device that serves as a crucial link in the chain of safety; it actively protects your property from devastating fires caused by lightning strikes and prevents sudden high-voltage surges from destroying your expensive household appliances.
Waiting for a severe storm to strike is a risk you have absolutely no need to take. When it comes to lightning safety, being proactive is always better, more affordable, and less stressful than dealing with the dangerous and costly consequences of a direct lightning strike.
FAQ
-
Why is grounding important for a lightning arrester?
Grounding safely diverts excess electricity into the earth, preventing damage.
-
Where should a lightning arrester be installed?
Near the main electrical panel or at the highest point of your home.
-
Can I install a lightning arrester myself?
Yes, if you have electrical knowledge, but hiring a professional is safer.
-
How much does a lightning arrester cost?
Typically between ₹7,600 and ₹35,200, including materials and labor.
-
Can a lightning arrester prevent electrical fires?
Yes, by stopping surges that can overheat wiring.
-
Do I need a permit to install a lightning arrester?
Be sure to review local rules, as some places mandate permits or certified electricians.
I am an electrical engineer and also a blogger. I write informative blog posts on topics related to electrical and electronics engineering. If you are interested in these topics, you are welcome to my site to read these articles.